

(Updated with even more info, November 8th 2008)
A while ago I made my own variation of Monster Mud: mixing pva glue with joint compound and adding color (instead of mixing latex paint with joint compound). My goal was to increase adherence, flexibility and strength, it worked.
But it was too heavy in weight for my tastes (I make comfortable puppets, I need them to be as lightweight as possible) The joint compoumd was the heavy element, so I needed to use less.
Well, tonight I made it much better, and not only in weight!
I diluted some Weldbond just enough to make it liquid.
Then I added some joint compound to bring it to the consistency of a well made brown gravy (or that of Caesar salad dressing). Then I tinted it with a small amount of dry titanium white pigment, and twice that amount of raw sienna. I should mention that my joint compound appears to be gray when wet, but dries slightly off-white.
 This finish was applied in a stippling fashion, with a soft hogs bristle brush, directly over my pm strip project.
Yikes! It's semi translucent! This means depth and randomness effect automatically! Each layer can be dried and another one added, then as many as you like. I'm at three layers, the depth is amazing. The finish is perfectly matte, and scratch resistant.
Just like the older version of the finish, this one will absorb paint very well, so using diluted paints will give you a watercolor effect.
Spray the surface slightly with water prior to painting. you can do a wet-on-wet technique, almost exactly like watercolor.
When perfectly dry, it can be sealed with a bit of heated clear shoe polish, rubbed in then wiped off. Painting it with any gloss medium or varnish would probably just kill the effect. But I encourage you to try it, you might find something even more interesting! Please share.
Maybe a spray matte or satin varnish would work well too. Oil based varnishes are usually much stronger, but you won't be able to re-touch with acrylics.
This finish should work well on most clean porous surfaces, such as wood, paper mache (strips or pulp), paper, canvas, and perhaps even some stones.
If you do not find Weldbond in your area (mostly a North American product), a good quality pva glue (white Glue, such as Lepage or Elmer's) should work very well too. Make a test in a small batch to be sure your pva glue does not react badly with your choice of joint compound.
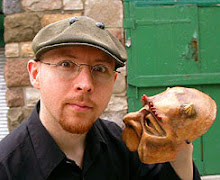
The lynx skull shown in pictures is a work in progress, made of paper mache strips (coffee filters and diluted white glue, sealed with Weldbond. Fangs and front teeth are carved wood, smaller side teeth are compacted pasted paper strips). It still needs work, such as a light sanding, added features (eyes, ears), massive antiquing, and a hinge for the jaw. Finished results will be posted on the Portfolio slideshow, on the main blog:
www.creaturiste.blogspot.com
NOTE:
For the original version of Monster Mud, consult the Terror Syndicate's website:
http://terrorsyndicate.com/tsp_mm.html
more info:
Mine is made of joint compound and diluted white glue (preferably Weldbond, but regular white glue works fine too), with artist pigments or acrylic paints for tinting it. My version is more adhesive and more flexible, even in thin applications, to avoid cracking caused by movement, impact and time. I use it a lot on my puppets and masks for Theatre, so everything i do has to be very strong and durable. This product answers that call very well. It can be applied in so many ways, creating so many different textures: painted, stippled, spatula, splashed-on, poured on... It can look like bone, rock(smooth or rough), leather, dirt, bark and I'm sure many other surfaces as well. It sands very well and very smooth. While wet, a denser formula of it can be detailed with a fine tool.
Over an already existing texture, it can be used to smoothen and soften the effect.
It hides small surface imperfections quite well.
I've recently use it as an adhesive to attach facial hair (mustache) to a puppet which already had the same formula (same bacth actually) as a basecoat. Result: the hair looked like it was actually growing out from the skin. Not microsscopilcally perfect, but very effective, even up close. The bond is very strong, thanks to the glue content.
Change the proportions of ingredients to change the properties: the more joint compound, the thicker it is, the heavier in weight, and the
more matte in finish. The more glue, the more flexibility and adherance. The more water in the glue, the easier the mix will be to apply with a brush (but don't add too much water, it would weaken the adherance and flex of the mix.
Once dry, it absorbs washes of paint so well that it remains a perfectly matte finish if not too much paint comes to clog the pores. This way, one can control the level of sheen...
If the washes are applied while the surface is not quite dry, the colors will react with the products inside, and create wonderfully unpredictable natural variations. Similar to the "wet on wet" principle in watercolor painting. Once the painted item is dry, it can be sealed with some liquid matte varnish, or clear shoe polish, heated to ease absorption into the surface. Nice leather-like effect with shoe polish.
It is my second version of the recipe, making it much lighter in weight, and smoother by itself, even before sanding.
It can also be used as an antiquing medium. Very diluted, it would dry unevenly and create nice heavy dust or dirt effects.
It can also be used as an antiquing medium. Very diluted, it would dry unevenly and create nice heavy dust or dirt effects.
New discovery (October 2008):
What at first could have been a weakness turns into a great finishing option!
This finish is re-soluble! Just wet it a bit, then rub with fingers or stiff brush to smooth the surface prior to painting. This way of mosothing brings the surface to a look almost identical to fired clay. Can also be done after painting, as long as paint was applied in washes and has not sealed the surface. The finish doesn't melt on its own, it does require rubbing, or long exposure to the water. So, even the unsealed works can still withstand a bit of rain, if not left in it too long.
Sealing this surface can be done with diluted Weldbond, or varnish or melted shoe polish.

3 comments:
I've tried your Monster Bone recipe last night, using diluted Weldbond (probably 3:1 watter:Weldbond ratio), and enough joint compound powder to get it to the consistency of a thick milkshake. With the pigments, it *looked* like chocolate milkshake, I had a hard time refraining myself from tasting it :).
Works great!
I'll experiment with it a bit more, but from you experience, is it possible to get it to a think enough clay-like consistency so as to be able to sculpt it? My recipe was still fairly liquid. You could use it for texturing, but certainly not to build up clearly-defined shapes.
Also, if one day you feel like it, a posting on your antiquing techniques would be greatly appreciated. The difference between your raw lynx head in this post and the final result is just amazing.
Thanks for your blog, it's really useful.
I don't think there is enough strength in the monster bone ingredients to create a strong enough clay. But I may be wrong.
I encourage you to try.
I know joint compound is also available as a powder.
It would be easier to make it thicker from something that is not already wet.
My antiquing techniques are simple: just paint the whole thing with a dirty color, and wipe or patt with a clean rag.
Leave more dirt in the tectures and deep areas.
Remove more on the high areas. A wet rag will remove more than a dry one.
Repeat as needed.
Post a Comment